The biggest question we get asked: Ok, we have a brand new website. Now what?
Never fear. This article will walk you through the basics of how to navigate, use, and update your WordPress site from Minor 5 Studio. We use WordPress for a reason — it’s not only the industry standard, but if you can use basic word processing, you can understand WordPress. So without further ado, let’s get down to the basics.
Posts vs. Pages
WordPress comes with two default content types called posts and pages.
What’s a Post?
Posts are part of the blogging functionality and appear in reverse-chronological order (newer items displayed first). Posts are best used for dynamic content like news, announcements, event information, or anything that has an expiration date. The reason is that because posts are displayed chronologically, it’s easy for old things to get buried in the stream of articles (posts).
What is a Page?
On the other hand, pages are meant to be static “one-off” type content such as your about page, contact page, privacy policy, custom landing page, etc. This is what we call evergreen content — it doesn’t die quickly or easily. For the most part, the stagnant data on your pages won’t change, though it can, of course. But it’s best to save pages for the sort of information on your site that needs to be easily referenced and rarely changes.
If that makes sense to you, then keep reading.
So let’s add some content to your website.
Because you purchased a custom website, you probably already have a few (or a lot of) pages and posts on your site. Don’t worry if you don’t have all the content you want for these at the moment. You can always edit and update them. In the following sections, we’ll show you how to update pages and posts (it’s a very similar process, thank goodness) so that you can add, expand, and update to your heart’s content.
Adding Pages
Head over to Pages » Add New page in WordPress admin area. This will bring you to the page editor screen, which will look similar to this, depending on your theme:
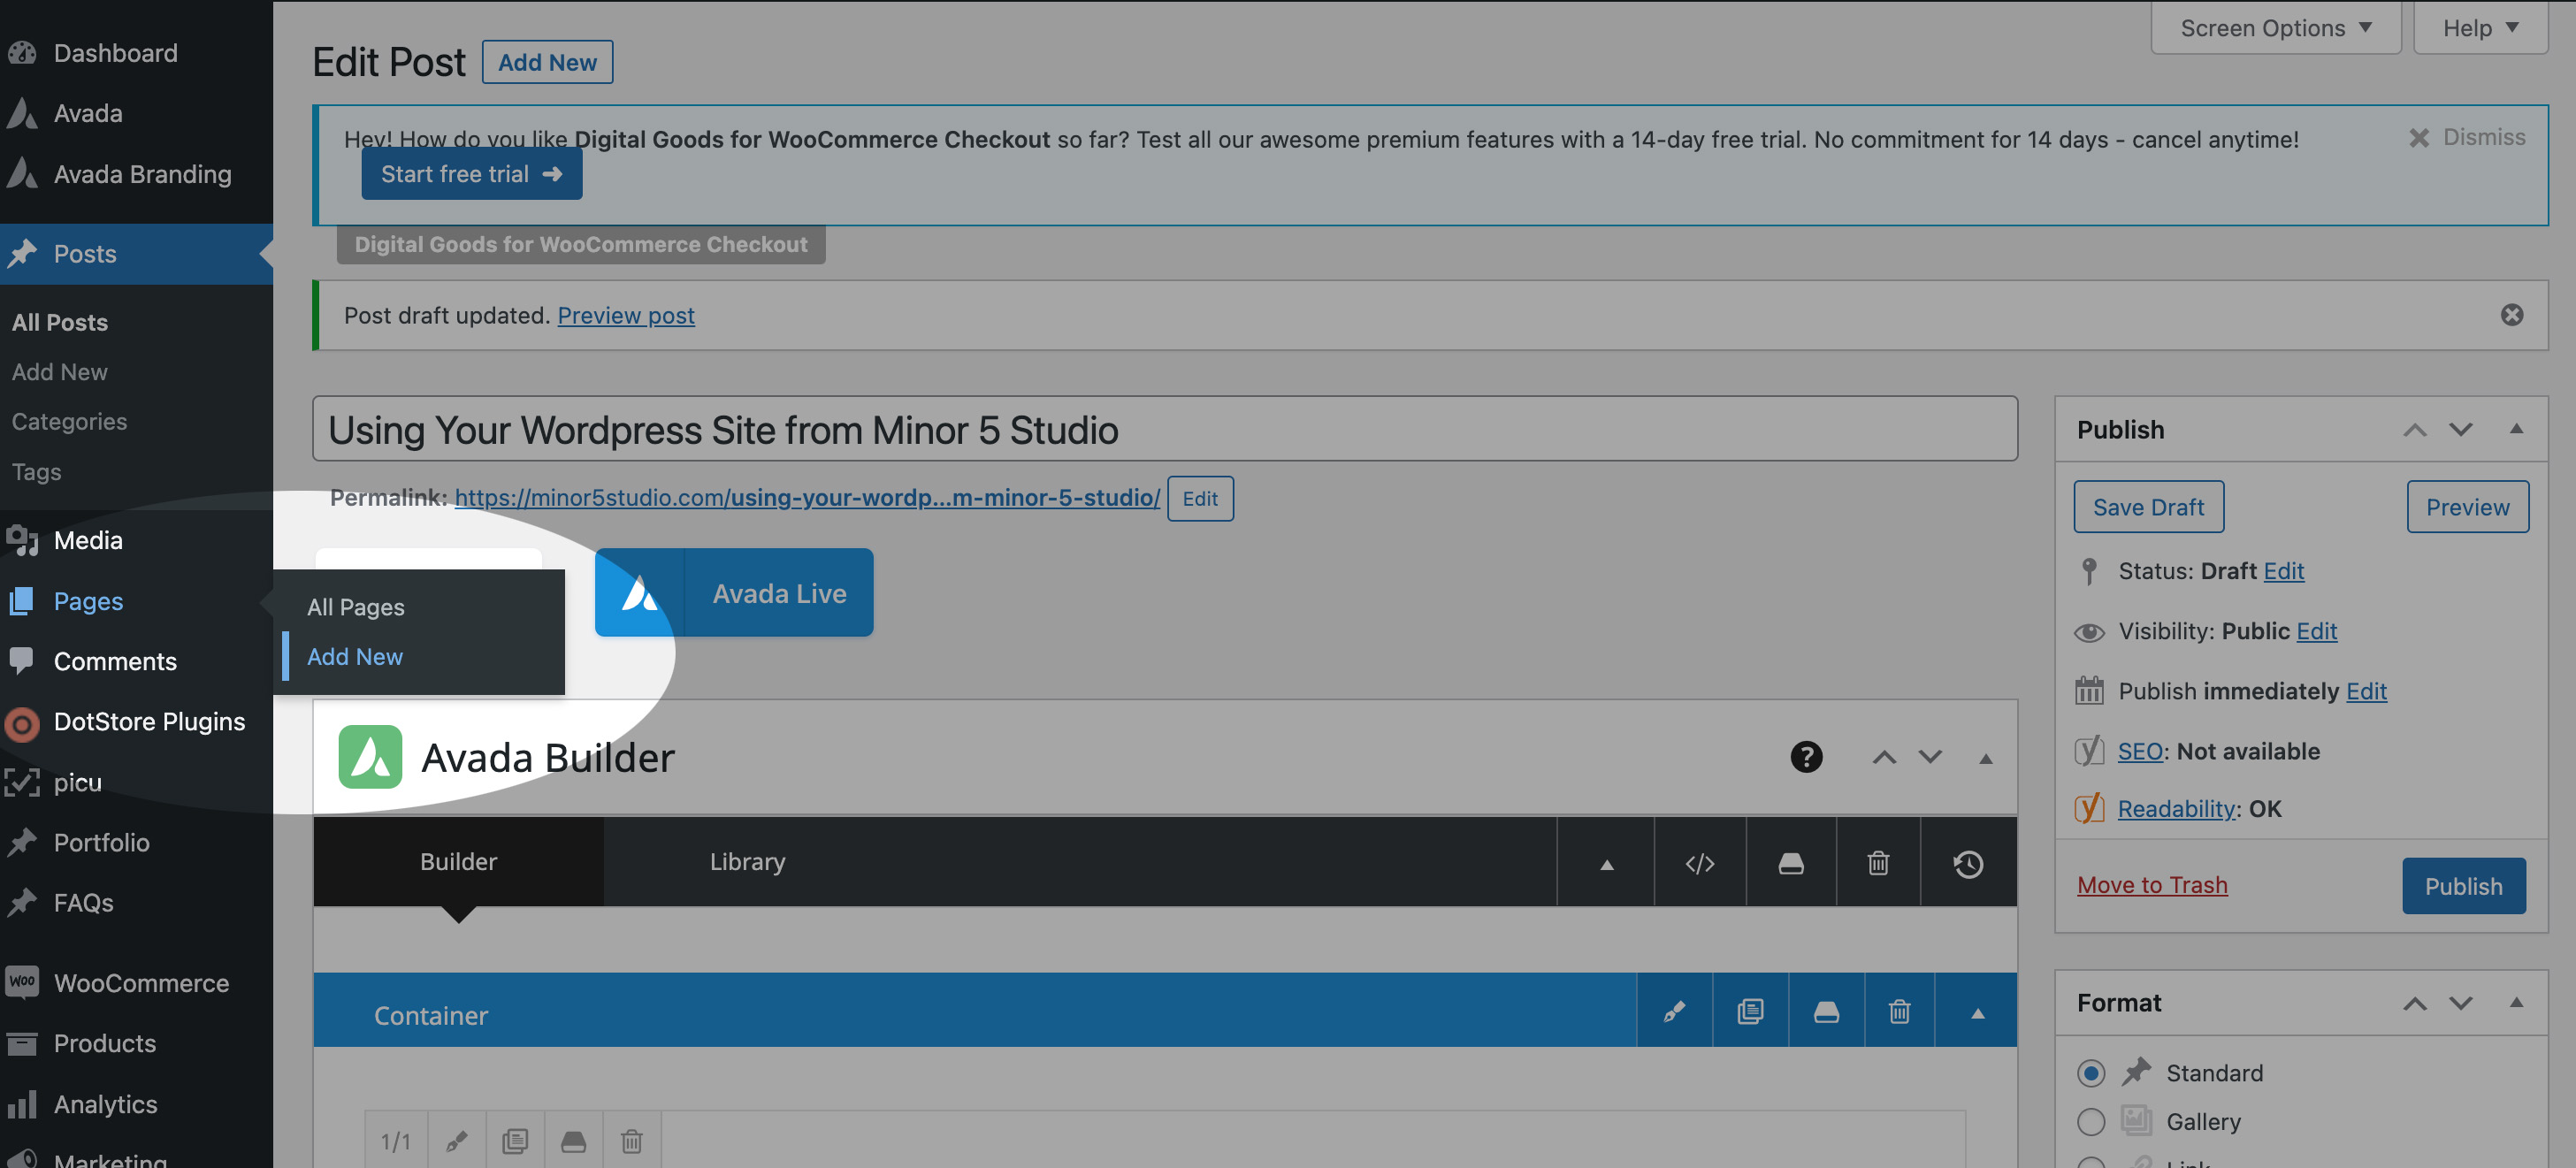
First you need to provide a title for your page, let’s call this page ‘My New Page’.
After that you can add content in the text editor below. You can add text, links, images, embed videos, audio, etc.
After adding content to your page, you can click on the publish button. While publishing makes the page live on your website, it WILL NOT add it to your menu. We’ll cover that in a later section.
Adding Posts
Head over to Posts » Add New in your WordPress admin area, where you will see a screen much like you saw earlier when adding pages.
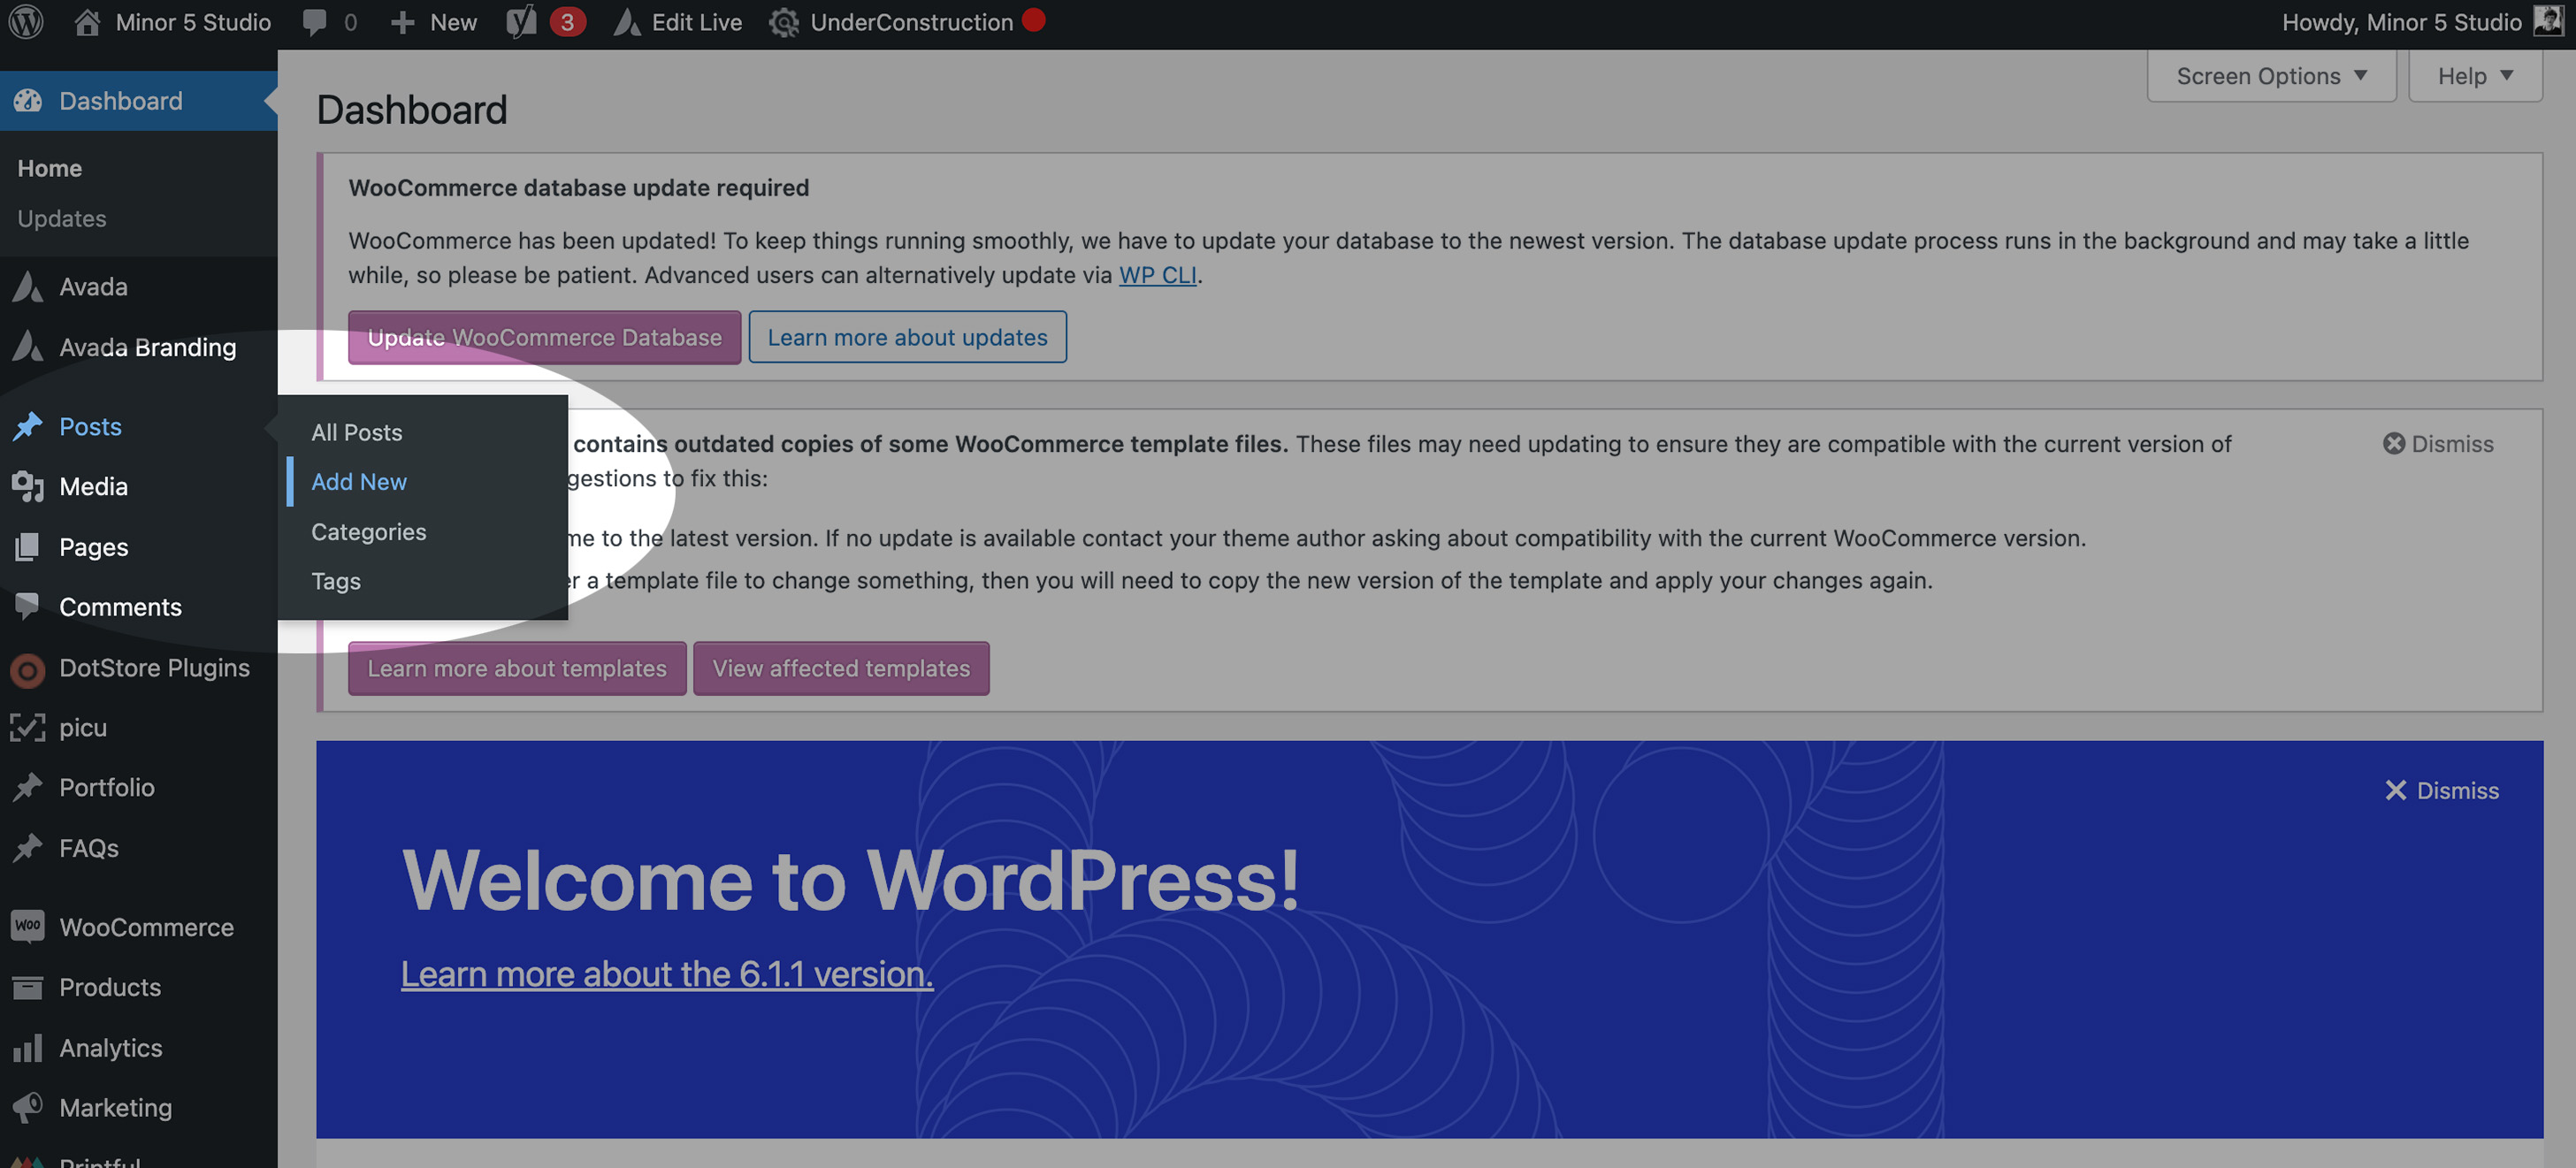
You can add a post title and then add content in the visual post editor. You’ll also notice some extra options in the sidebar like post formats, categories and tags.
About Categories
Categories are the general way you organize your blog. So for example, if your website sells pet products, your blog might include categories like:
- For Dogs
- For Cats
- Specials
- New Arrivals
- On Sale
The point of a category is to give your readers an easy way to sort through your content and find the information they’re looking for more quickly.
About Tags
Tags, on the other hand, are a little more nuanced. You don’t need to stress yourself about them, but if you’re the curious type and would like to learn more, do some quick Googling about the best way to use tags on your website. They are wonderful to help with SEO (Search Engine Optimization) and CRM. Basically, tags are the way to let the rest of the internet know what your site is all about.
Note: You do NOT have to use tags, but you must use categories. By default, WordPress will assign any new past as “Uncategorized” until you choose one of your categories.
So now you’ve created your post, added all that glorious content, chosen your category, added a tag or two… You can now click on the save button to store your post as a draft or click on the publish button to make it visible on your site.
Adding Pages to Your Menu
Like we mentioned earlier, when you add a new page and hit that blue Publish button, while it’s now technically LIVE on your site, it’s nowhere to be found on your menu. (The menu is that bar usually at the top of your website with links like About Us, What We Offer, Contact Us, etc.) Every site’s menu is a little different, but they all serve the same purpose — a way for visitors to find your stuff.
So let’s add that new page to your menu. Head to Appearance > Menus on the left-hand column.
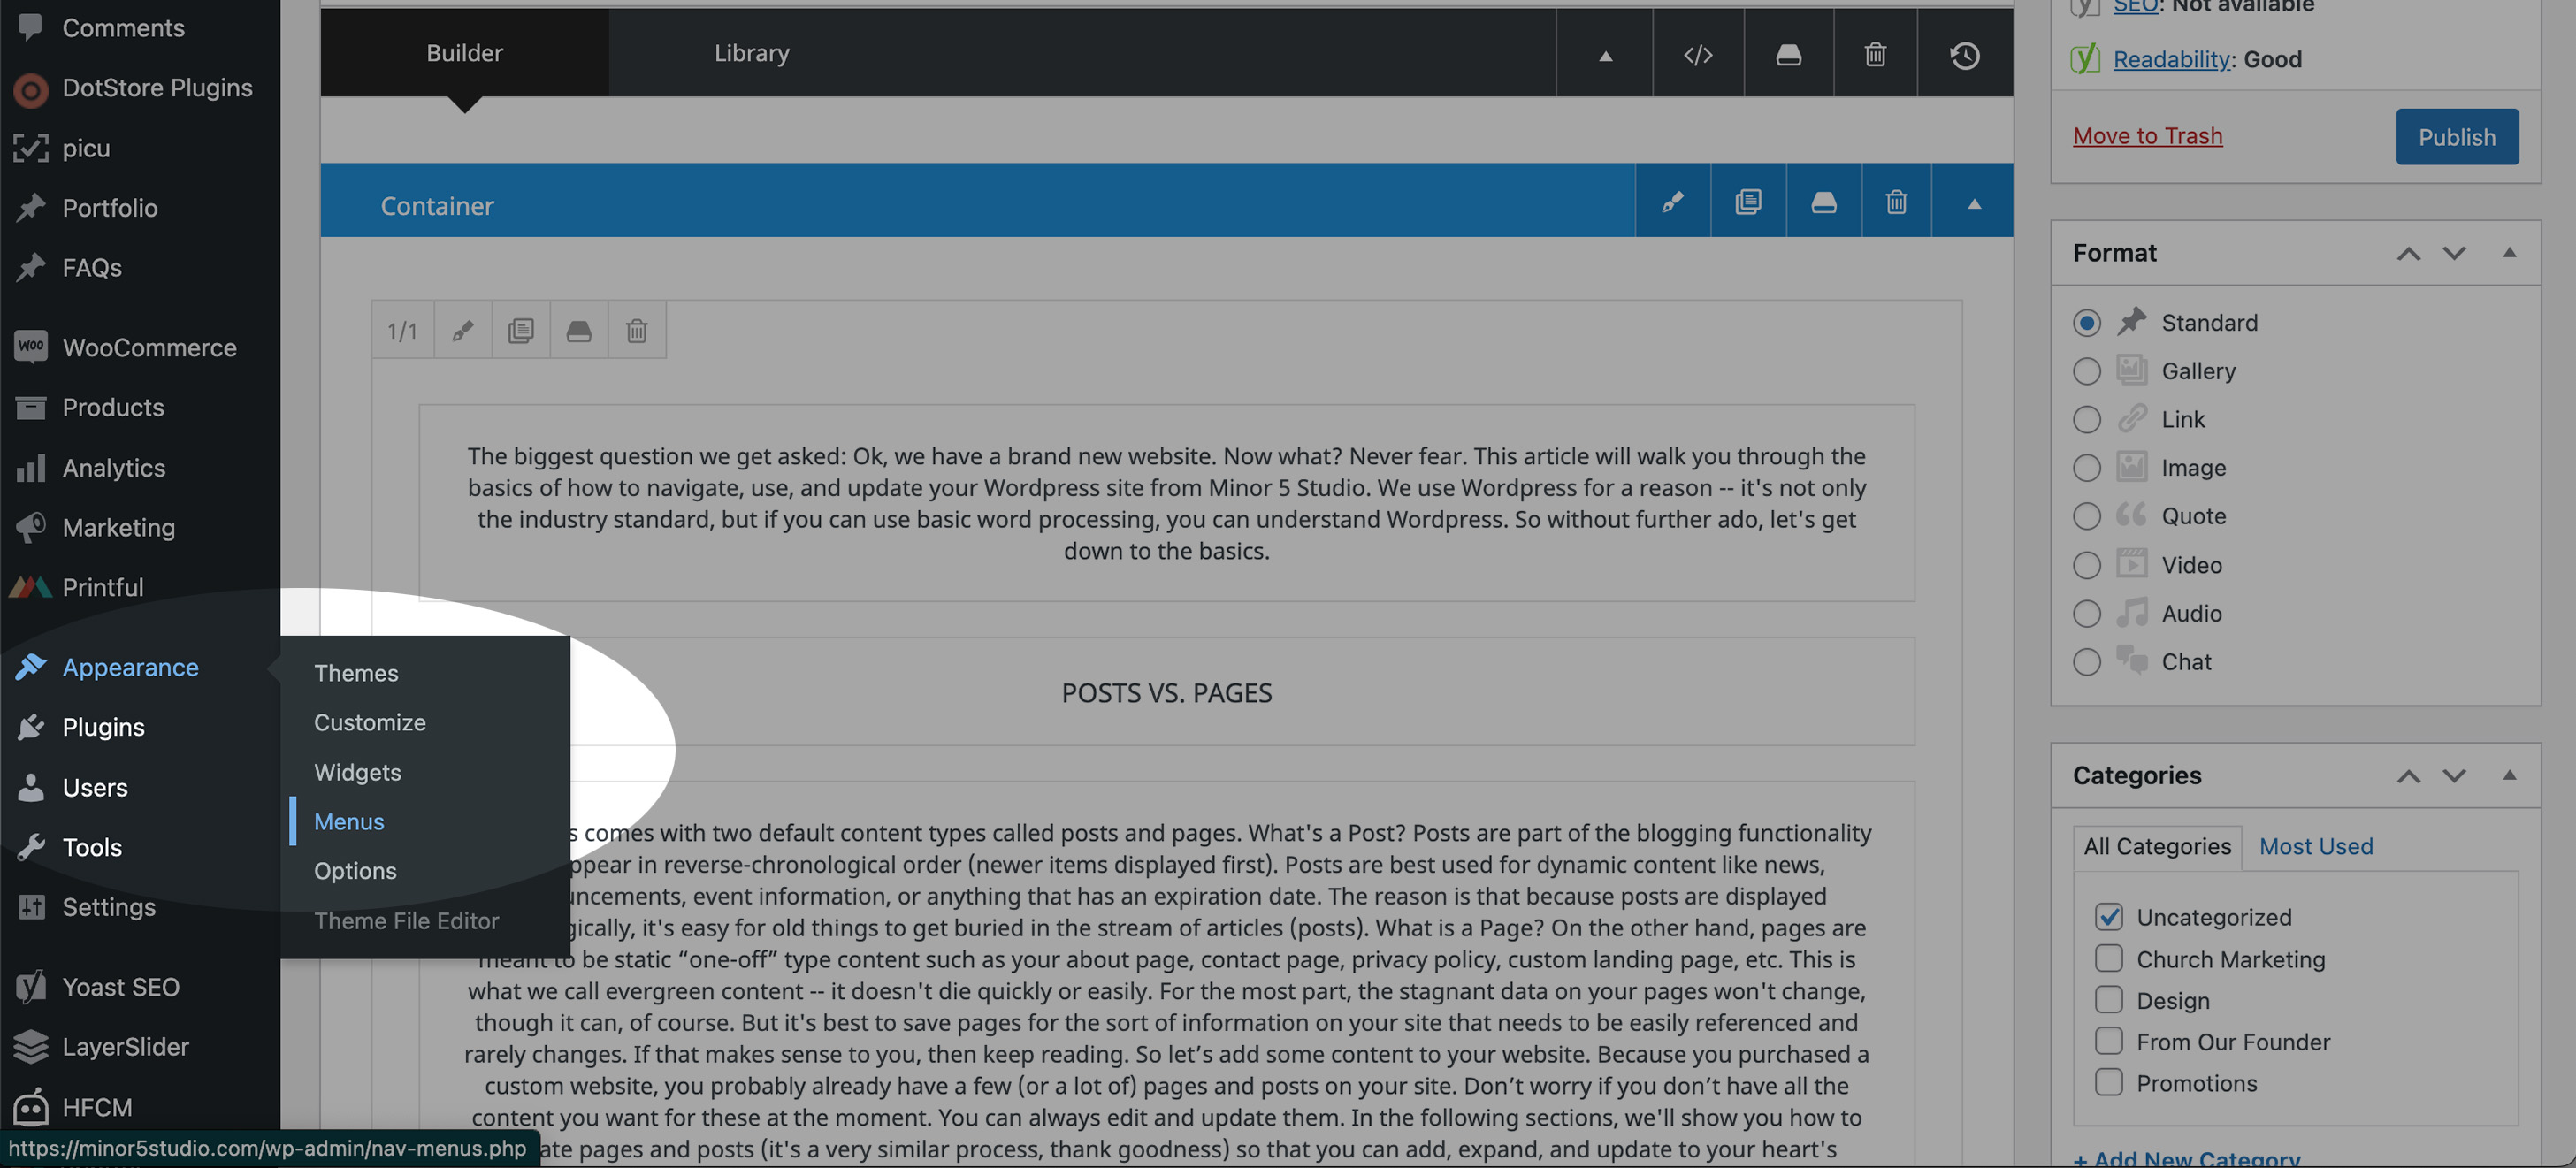
Your options will not look the same as ours (because your site doesn’t have the same content), but the general principles apply. The most important thing is to look at the top and MAKE SURE you’re editing the main menu. If your top drop menu doesn’t say “(Main Navigation)” at the end, toggle down and select the menu with that option.

Next, you will see a list of your most recent pages on the left-hand side. Most likely, the page you just created will be at the top. (Our most recently created page was named StoneWater, as noted with the red circle.) Toggle that check box and click “Add to Menu.” Then you can drag and drop the page where you’d like it to appear on your menu. Indenting the page under the one above will add it to the drop down instead of the main bar.
Once you’re happy with the placement, hit Save Menu at the bottom and voila! Once you refresh your website, the page will now be in your menu.
Need More Help?
This article is meant to cover the basics of WordPress. But of course, there’s a lot more your site is capable of. It just comes down to how much you want to learn.
As always, if you need an update or change to your site beyond the scope of this article, don’t hesitate to reach out to us. We’re always available to help!


Leave A Comment